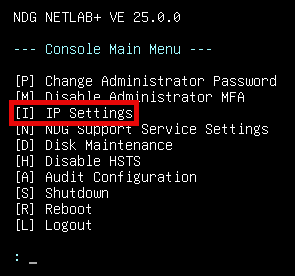
Configure Network Settings
Press I for IP settings from the Console Main Menu.
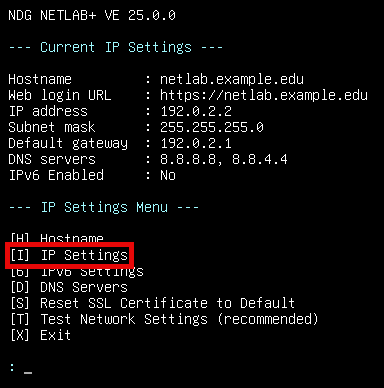
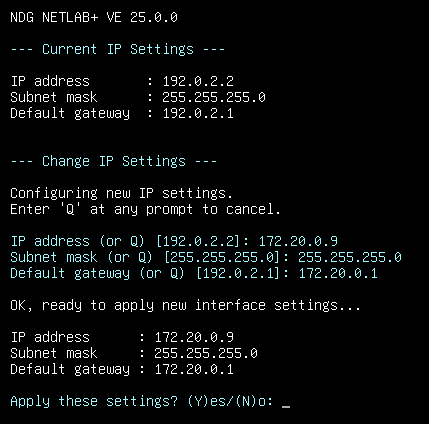
Set IP Address
Press I for IP Settings.
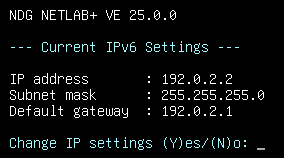
Review current settings, press Y for Yes.
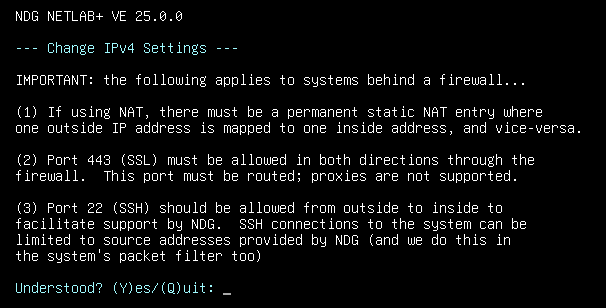
Review the requirements, press Y for Yes.
Enter the subnet mask.
Enter the default gateway.
Press Y to apply the settings.
Enter the IP address.
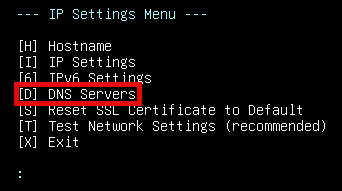
Set DNS Servers
Enter D for DNS servers.
Select L or G, depending on if you are using local or Google (default is G).
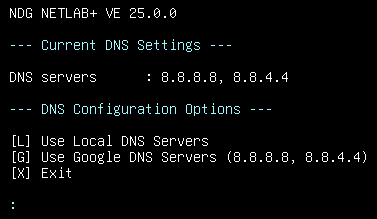
Continue to follow the onscreen prompts to complete the process.
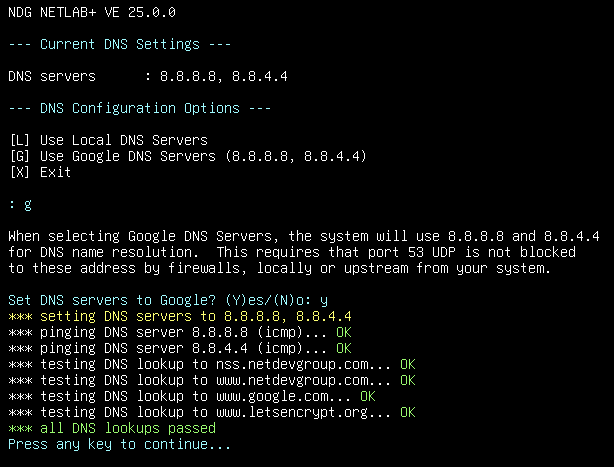
Verify that all DNS lookups pass. Press any key to continue.
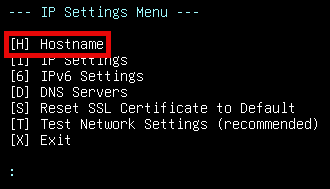
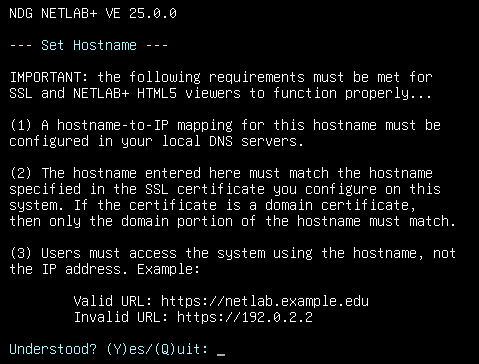
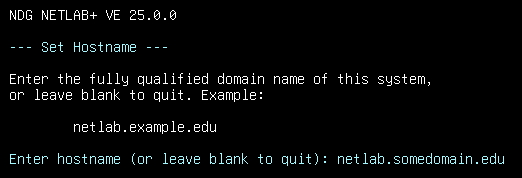
Set Hostname
Press H for Hostname.
Review the requirements and then press Y for Yes.
Enter your Hostname, press Enter.
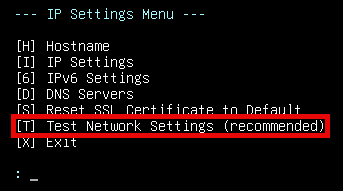
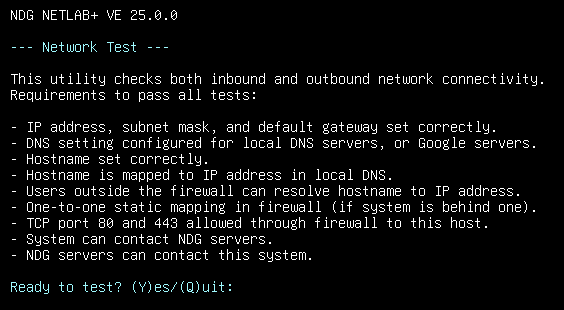
Test Network Settings
Press T to test the network settings.
Review the requirements and then press Y for Yes.
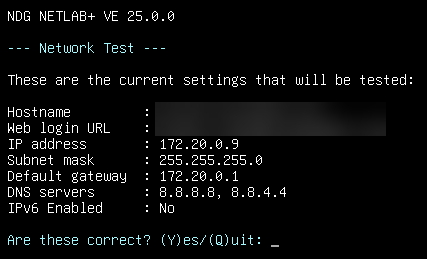
Verify that the settings are correct and then respond with Y to proceed with the test.
Verify that the settings are correct and then press any key to continue. You should see results similar to the following:
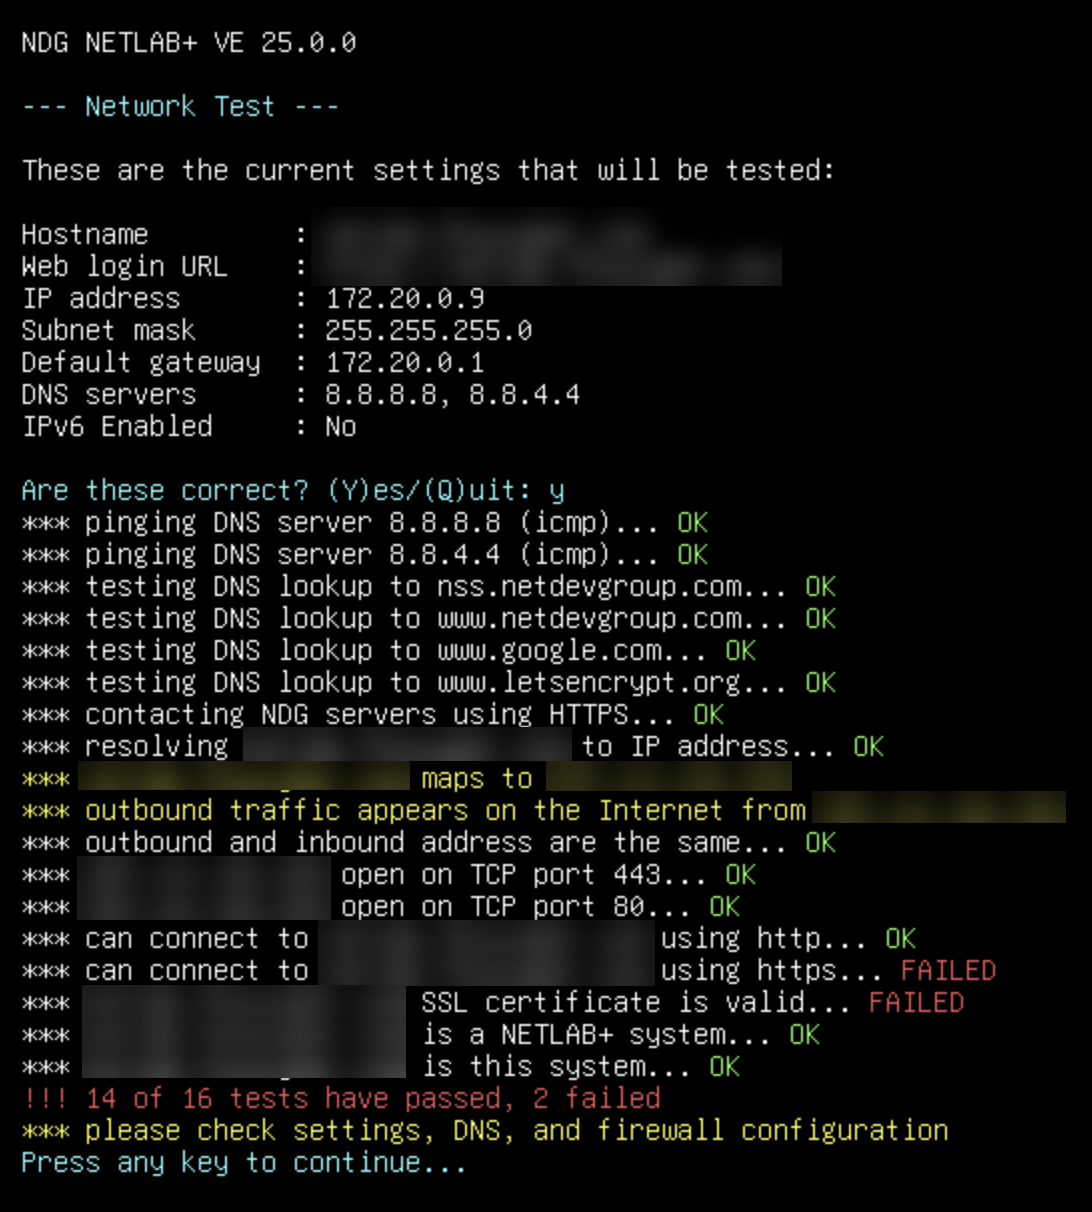
Note
There are two tests that will fail: can connect to server using https and server SSL certificate is valid.
This is normal as you have not yet configured SSL. You will complete this through the web browser.
Enter X to exit the IP settings.

Press L to logout.
